In this day and age we are a lot more fortunate than in times past, because we can store manuscripts on a computer, print them out, and make multiple backups. But what if, despite everything, you accidentally delete your prized magnum opus?
(All the advice that follows is based on my experience of using Windows.)
If you have merely hit the Delete key, then probably all is not lost, because files tend to be put into a Recycle Bin rather than destroyed completely.
Either right-click on the Recycle Bin (as shown), or open it and select the individual file(s) you wish to recover, and right-click, or click on the menu item “Restore all items”.
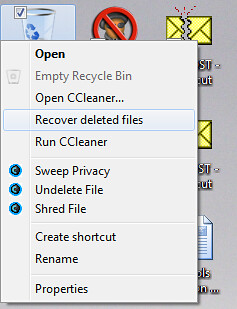 Right-click on the Recycle Bin icon to retrieve all deleted files
  Open the Recycle Bin and select individual files to restore
What happens then is that the files are returned to their original location.
If you have done a “proper” job of deleting the files – which means either holding down the Shift key when you press Delete, or emptying the Recycle Bin – you may still be in luck. This is because when you delete files, they are not destroyed immediately, but their existence is removed from what is, in effect, the disks table of contents. Because the disk now “thinks” that the space occupied by those files is now free, it will start using it to store files in future. That means that over time it becomes harder and harder to recover lost files, at least in their entirety, because some or all of each file will probably have been overwritten by newer ones.
There are, it should be said, some heavy duty file recovery methods, and there are companies that specialise in recovering data – at a price. But the best chance of success is to be found where you realise pretty quickly that you have deleted a file you wanted to keep.
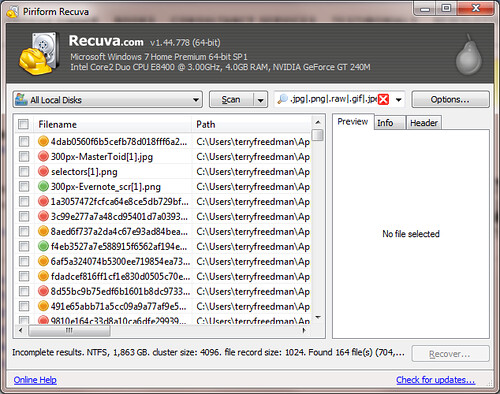
Over the years I’ve tried several recovery tools, and found none of them to be perfect. However, one I discovered recently is quite impressive, and it’s free. It’s called Recuva, and you can download it from Piriform.
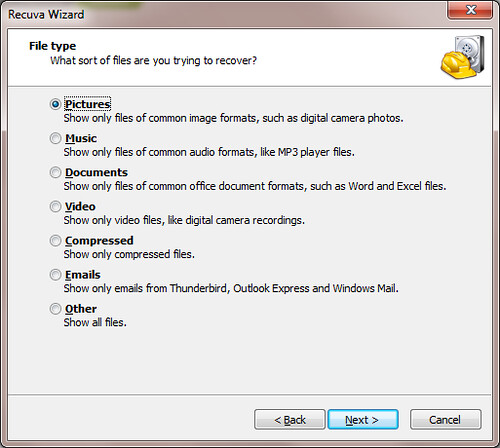
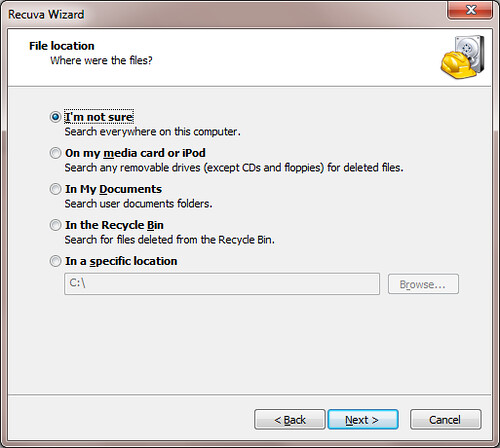
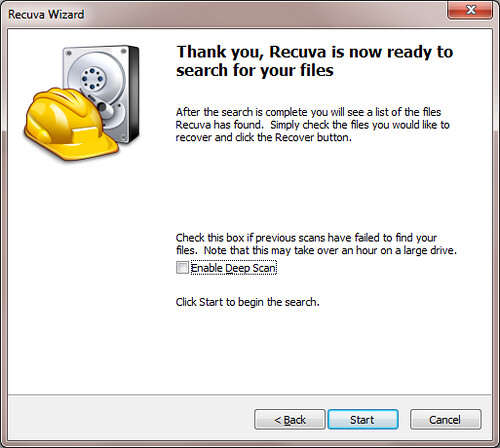
When it starts a “wizard” starts running. This enables you to select the sort of file you are looking for, and where to look for it. If you deleted it a while ago, you may wish to select the “Deep Scan” option, but be warned that on a large drive this could take ages.
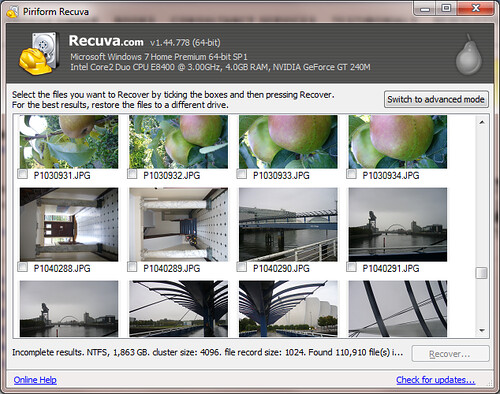
Once it has found some files, you can switch to Advance Mode for a listing.
As you can see, the files are colour-coded, which the Online Help available describes as:
“green for excellent, orange for acceptable, and red for unlikely”
I’ve found that with red and orange files, you can usually retrieve something of the original, which may or may not be better than nothing, depending on the circumstances.
Still, Recuva is a nifty little programme, is free, and helps me sleep better at night!
